The Custom Shop

PLEASE READ everything below, prior to starting your new Re-Theme project :

There is a lot of information to take in, and we don’t want you to waste your time working on your project only to find out you did something that we can’t use in the production of your new components.  We are here to help you. We want your project to meet the expectations you have come to love about CPR.  If you have questions or concerns, even if they are small ones, contact us for discussion – we will help you!

There are many different production options that we offer, as well as different levels of assistance.  Again, every project is different, and some people will only need our help with production of specific components, and not others. ­­ For example, some customers may want just a plain backglass, while others may want a backglass with mirroring, etc….

Everything is custom.  Since every project is a one-of-a-kind, time expectations will vary.  Remember, we can’t simply stop all of our production lines to fit in one single project, but we will do our best to deliver your components as timely as possible.  Therefore, we cannot commit to a specific turn-around date for each project, as they are all different in aspects of the amount of design & work for each project.  Some customers will be very talented in the graphics arts & layout department, and will throw us a project that is essentially print-ready.  Others will just have the dream, and will need to hire for every single aspect of their project – including the artwork.  Depending on your time and budget, every Re-Theme can be possible.

The Process

Here are some initial tips and things to be mindful of:  The first thing we recommend is research your Re-Theme project.  Choose the base machine you want to Re-Theme, but research it first.  Spend the time.  A lot of time.  Plan for everything.  In choosing your game title, you want it to coincide with your new Theme.  Once you have your base game selected, start writing down some of the things you want to accomplish with your new Re-Theme.  Don’t start with thinking of new artwork – think of it as building a new house.  First you need a plan. You work on the foundation, then start building the framework, etc. The “painting” comes last.

Once you have your game title, theme, and plans, then we can start on the playfield architecture.  This is the precise scale physical layout of the playfield’s features (inserts, openings, etc).  Your best option at this point is to have our Art Director put together the architecture for your playfield.  This will assure you perfect fitment of your new artwork to the existing playfield when it come time to print.  If you choose to do the architecture layout yourself, CPR will not be able to guarantee the artwork fitting your playfield.  If the artwork does not fit correctly, we will contact you for options.  (Fixing customer-provided artwork with layout issues will incur additional costs)  The goal, of course, is to get the print correct the first time, glove-fit and perfect as possible.  We don’t want to ruin the original playfield provided, as it can only go through so many topside sandings before the first veneer is gone and it can no longer be used.  We highly recommend using our CPR Architecture option. ( click for a sample Architecture file )

­We highly suggest that you work on the entire Re-Theme all at the same time, so that everything matches and looks like it all belongs together. Otherwise it could end up looking like things just aren’t right….

Artwork Guidelines

Artwork Guidelines:  Please use the following guidelines when developing your new artwork:  You can work in either Photoshop CS6 (or earlier) as layers ( .psd ) or in CorelDraw ( version 19 or earlier) ( .cdr ) / Illustrator CS3 (or earlier) ( .ai ) as layers.  We will not work from .jpg, .tif or .pdf files.  All colors must be in RGB or Pantone PMS Colors.  Note that ALL computer monitors are different and will display your graphics differently.  So, what you “see” on your monitor is not necessarily what it will look like printed.  The best colors to use are PMS Pantone Colors as we can color match those on our digital press.

Pasteboard:  Prior to doing any Artwork, you must create your Paste Board with at least a ½” Border of Blank Space around the printed artwork area.

Scans:  All Scans should be in RGB format at 100% size of Original at 300 DPI.

Resolution:   If working in Photoshop then All Artwork should be created at 100% size of Original at 300 DPI.

Color:  All Colors should be either RGB or PMS colors.   Do not use CMYK Colors.

Bleeds: 

  • Plastics require a 1/8” Bleed for All Colors & White Layers beyond the Cut-Line.   Cover all mounting holes  with art.
  • Playfield holes require a 1/8” Bleed for All Colors & the White Layers.   Cover all mounting holes with art.

Laser-Cut Lines:

  • All Plastics require a “Vector” based Laser-Cut Line ( .ai or .cdr only ).   Photoshop cut-lines will not be accepted in “Raster” formats ( .psd, .pdf, .tif, .jpg, gif., etc will not be accepted ).

Fonts:   When working in Photoshop, you Must Convert All Fonts to “Raster” layers making them a single object Prior to sending to us.   When working in Vector formats you must convert all Fonts to “curves or objects” making them a single object Prior to sending to us.   If you supply us with a file that contains Fonts, we will reject it.

Filters:  When using Filters, you must “apply” the Filter to the layer making it a single object Prior to sending to us.

Masking:  When using Masks, you must “apply” the Mask to the layer making it a single object Prior to sending to us.

There is no limit to the number of layers you create in the development of your artwork layouts.  However, the final print layers must be structured as follows:

Plastics:  Vector Cut-Line, Black Print Layer, Individual Color Print Layers, White Print Layer

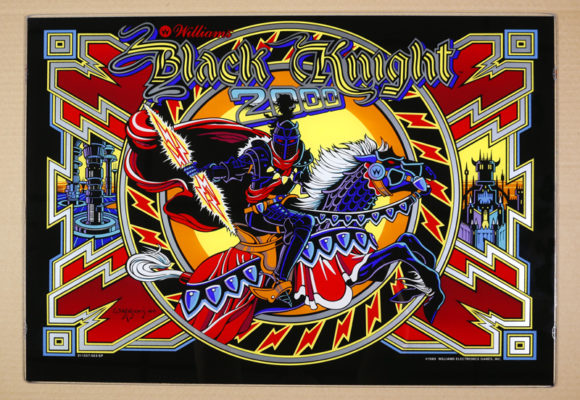
Backglasses:  Mirror Print Layer ( if choosing that option ), Black Print Layer, Individual Color Print Layers, White Print Layer, Light Blocking Print Layer ( if you choose to use light blocking ).

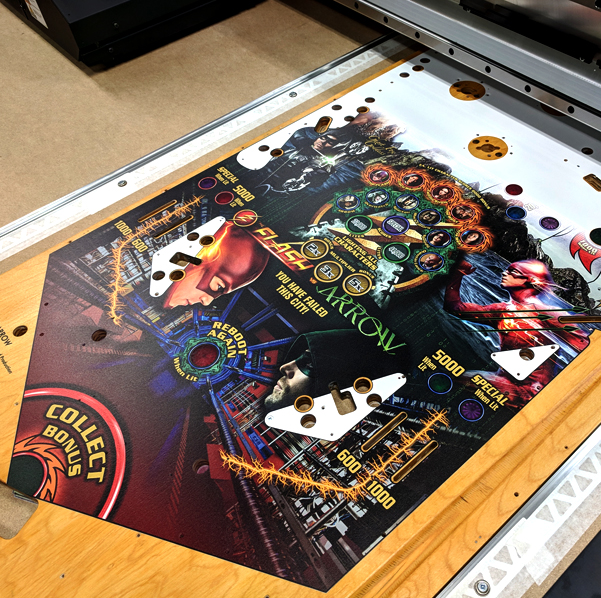
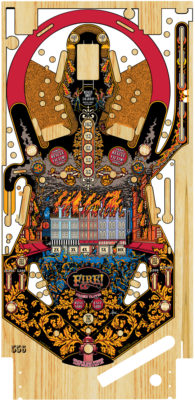
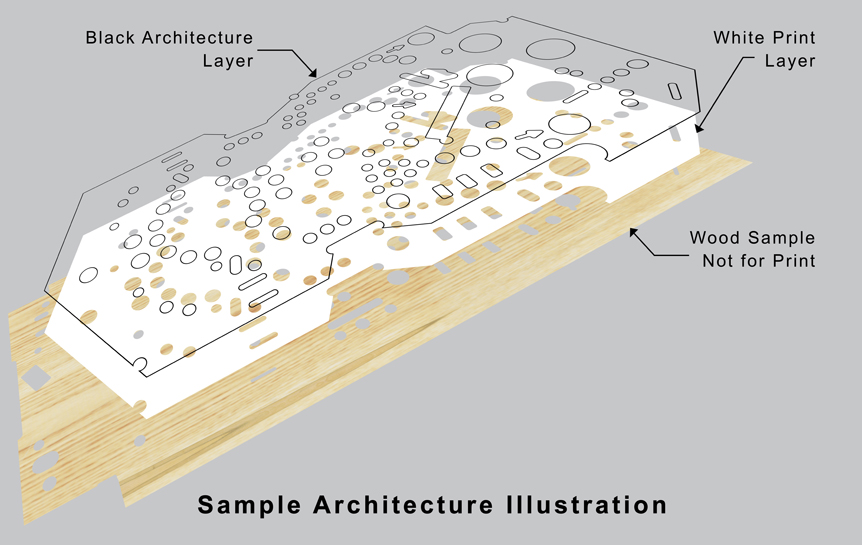
Playfields:  Black Print Layer ( Architecture Layer ), Composite Color Print Layer, White Print Layer, 2nd White Print Layer *

*NOTE: The 2nd White Print Layer is specific to Inserts that are covered with graphics.  The 1st White Layer has the Insert “knocked-out” of the White, while the 2nd layer of White will completely cover the insert.  This is so that the Colors of your graphics are a true representation of the color as well as only 1 layer of White will allow a lamp to fully light-up the insert.  If you have any questions regarding this please contact Stu at: [email protected]

Color Proofing:   Customer is responsible for shipping to us a signed & dated full-size color proof print of each project being printed once they have approved all colors.  Our print operator will use the customer’s approved proof print to color match all projects.

Custom Artwork

Playfields:

  1. You must supply us with a scan of the playfield we will be printing on. We will only accept a Cruse Scanner scan.  If you don’t have one in your area, we can help with this step.  Scan your playfield at 100% of original size at 300 DPI, RGB Color.  The playfield must be the actual playfield being used in the Re-Theme.  Do not scan a playfield that we will not be printing on.  Insert locations and openings are not identical with a 2nd playfield of the same title!  All original playfields were cut in bulk on dozens of different machines, each with their own “zero” point, and will all have slight differences.
  2. Send your playfield and the Cruse scan ( on Disc ) to Stu, our Art Director, for creating the architecture layout.  He will set up the architecture properly so that your new custom artwork will glove-fit correctly on the original factory playfield during the printing process at the end.  The “architecture file” will be sent back to you as a Photoshop .psd layered file.  It will be properly scaled, skewed, and rotated to fit the original factory playfield perfectly PRIOR to you doing any new custom artwork. ( click for a sample Architecture file )
  3. Once you receive the architecture file from Stu, you can start creating your own custom Re-Theme artwork. Or if you want, you can commission Stu to develop your new custom artwork for you.  This step depends on the graphics arts skillset of each customer.  Some will do all their own layouts.  Some will hire Stu to do everything.  It’s your call.
  4. All new custom artwork will go back to Stu for final review prior to any production work.
  5. Once Stu has approved your new artwork for production, it will be sent to our main shop, along with your original factory playfield, for final production.
  6. Your used playfield will be prepped, printed, and clearcoated, then shipped back to you.

Plastics:

  1. With your purchase you will receive 2 sets of plastics from your custom artwork.
  2. All plastics are printed on PETG and laser-cut to your vector cut-lines.

Backglass:

  1. With your purchase you will receive 2 backglasses from your custom artwork.  One for your game, and one as a wall-hanger for framing (or spare as insurance in case of a future breakage mishap!).
  2. Our custom backglasses have an option to include mirroring at no additional charge.  This option allows you to create some really cool effects with your new artwork.
  3. Don’t forget to add a separate layer in your artwork for light blocking.  This will enhance the lighting effects when your backglass is illuminated.  Flip any traditional backglass over and look at the backside.  Most will have this dark grey layer on the back, that most people never really think about.  You will need to ponder how you want your glass to illuminate, and plan out this layer.

Cabinet Decals:

  1. All of our cabinet decals are printed from customer supplied artwork using UV protected inks on a premium adhesive backed vinyl – and laminated for protection.  You will receive 1 complete set of cabinet decals with your purchase.
  2. Cabinet decals include 1 Front Panel, 1 Left Side Panel, 1 Right Side Panel, and Both Left & Right Backbox Panels.  There is no additional cost to add 1 apron decal, target decals, and/or shooter-lane guide decals.
  3. If you want our Art Director to custom design your cabinet decals, please contact him here:
    [email protected]

Toppers:

  1. With your purchase you will receive 1 custom topper for your project.
  2. All of our custom toppers are contained within a 11-½” x 23½” framework.  You can customize the shape of your topper any way you like, as long as it fits within the framework.  All toppers are laser-cut from 3/16” acrylic, giving the edges a shiny glass-like look.  All toppers have mounting holes wherever you want them.  However, the mounting hardware is not included.  Each customer will have their own mounting plans.

Descriptions

Custom Playfield:  Customer supplies used original factory playfield completely ready for printing.  Customer has properly sanded all the original graphics off the playfield, changed out inserts, leveled everything, repaired any wood defects, etc. This option is considered “ready for print”.  It is at CPR’s discretion to determine if a playfield is “print ready”.  If you choose this option and we determine that your playfield needs additional work, you will be notified and given a quote of what it will cost for CPR to bring it to “print ready” quality.

Custom Playfield Option:  As an upgrade, we can CNC-cut you a completely new playfield for your Re-Theme project, as long as we have the original factory title in our current catalog of CAD Files.  Please ask us if we have your original factory title prior to purchasing this option.  If we do not have a current CAD file for your game title, we can create a new CAD file for an additional fee.

Custom Backglasses:  Includes 2 printed backglasses, with or without mirroring.  Trim pieces are not included, so you will need to use your existing trim or purchase new trim from a small-parts supplier.

Custom Plastics:  Includes 2 sets of plastics, laser-cut and ready to install.

Custom Toppers:  Includes 1 custom topper, laser-cut and ready to install with your planned mounting hardware.

Custom Cabinet Decals:  Includes 1 complete set of cabinet decals ready for installation.  Decals are printed using UV protected inks, on a premium adhesive backed vinyl, and laminated for protection.